


I started quilting about 23 years ago after I had 3 children in 3 years. If that wasn’t enough, I also worked full time as a nurse. To say I was a little depressed, over whelmed and exhausted was a bit of an understatement. Lets face it friends, even when your living the dream, sometimes LIFE IS HARD! Lucky for me, I married a great guy. One day I came home and told him I wanted to go on a quilt retreat in the Utah mountains for 3 days. He happily said…GO! You know he must be a great guy if he was willing to watch a 2 year old, a one year old and a baby by himself for 3 days. That or mentally insane! I found out that weekend, that one of my greatest gifts I have been given is CREATING. I whole-heartily believe we were born to be creators. Whether we are making a quilt, an amazing meal or an awesome child. Creating feeds our spirit and helps us grow and become our best selves. My first quilt wasn’t anything amazing but the therapy and “happy” it gave me was! I had found my medium of creation and it was fabric.
Why the “Grateful” Quilter? Why not the happy quilter or joyful quilter? For starters, some of those names were already taken, (nice job on the names friends!) But more than that, simple gratitude brings joy and happiness. It’s hard to feel angry or upset when we are truly grateful. And who doesn’t need more happiness and joy in their life?
I also believe that we get back what we put out there. Think that’s crazy? Go yell at your husband, dog or child and see what it does to the mood of your house. Go into a room where someone has been fighting and you can feel the tension in the room without anyone saying a word. Find a quilter who keeps cutting off the points of her triangles all day and see what kind of mood she is in. HaHa! We send energy out into the world and we get that energy back.
Why the “Grateful” quilter? Because quilting and gratitude have brought me more joy than I can even begin to say. They have given me courage to face life in my darkest hours. They are my secret weapon, my super power, my gift!
In the spirit of gratefulness, I thought it would be fun to share a Thanksgiving pattern with you. Although I have written quilt patterns for a number of years, this is my first attempt at blogging one!
Give Thanks Wall Hanging

Cutting Instructions
Sky Blue
Cut 1 square — 10½” x 10½”
Blue
Cut 2 strips — 2½” x width of fabric
From that: Cut 24 squares — 2½” x 2½”
Binding: Cut 2 strips — 2½” x width of fabric
Brown
Cut 8 rectangles — 2½” x 4½”
I have only included step by step instructions for piecing the wall hanging in this post. To download the full pattern and instructions for this piece click here.
You can applique the squirrel any way you would like. We will go over different applique methods in the months to come. This quilt was made using fusible web. My favorite is Steam a Seam Lite. Follow the manufactures instructions for how to use their product. Blanket stitch around the pieces after they are ironed down. I like using matching thread because it hides a multitude of sins! But sometimes I will use black thread because it outlines the pieces. I’ll let you choose!
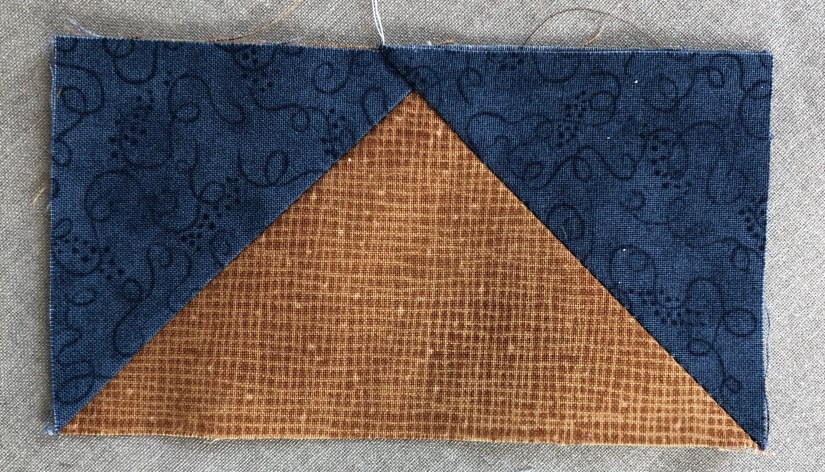
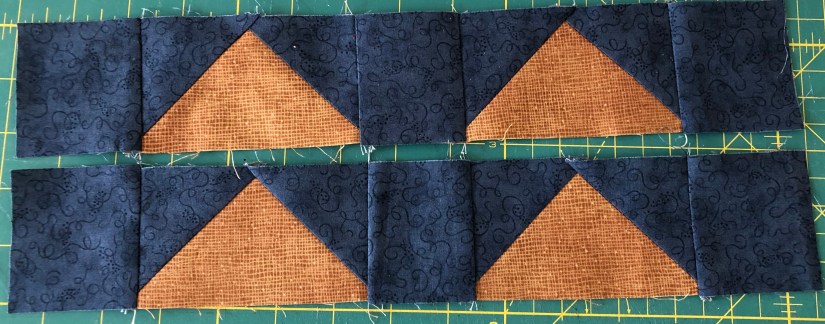
Piecing the geese!
This little unit is called a flying geese unit. Because my husband is a outdoors man, I would like to take credit for the name. But they were called flying geese long before any of us were born! That is one of the reasons I love quilting so much. Quilting connects the past and present. If you can learn to make flying geese, you will have the skills to make many different quilt blocks.
With right sides together, align your blue square on the left side of brown rectangle. Using a marking pen, draw a diagonal line corner to corner on the blue square; noting the direction of the line. Stitch on the drawn line.


Press toward the blue fabric. I like to press first and then trim my excess off after. Make sure to line up the top left corner when you press. Fabric is stretchy, even if it doesn’t seem like it is. If you line up the corner, you end up making the piece the shape you want it to be in the end. If you don’t line it up, when you trim it, your goose will look like hes flying crooked.
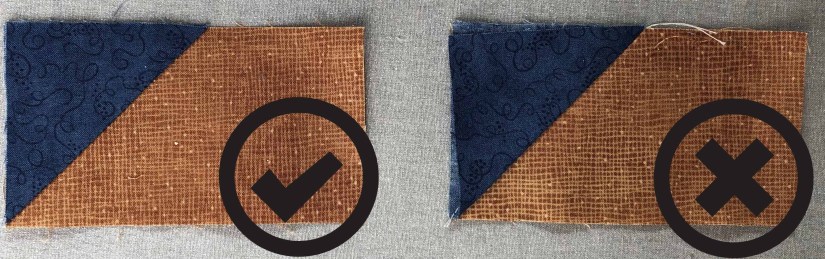
After it is pressed, then I will pull the fabric back and trim the excess to 1/4 inch.

You are going to repeat that same process on the right corner. With right sides together, align your blue square on the left side of brown rectangle. Using a marking pen, draw a diagonal line corner to corner on the blue square; noting the direction of the line. Stitch on the drawn line.

Now press toward the blue; lining up the top right corner.
After it is pressed, pull the fabric back and trim the excess to 1/4 inch. The back of your goose should look like this.

You have just left the nest and have completed your first flying geese unit! Fly birdy fly! Haha! You will need to make 8 Geese Units.

With right sides, seam a blue square between the two geese units as shown. Press toward the blue square. You will need to make 2 of these units.

Sew these units to the right and left of your appliqued square. Press toward the appliqued square.
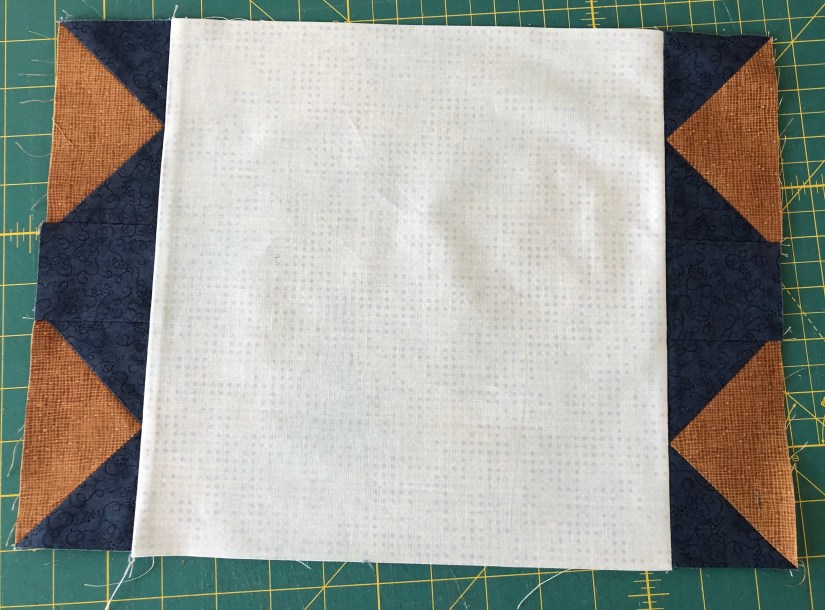
Repeat the above process. This time sew a blue square to both ends of the flying geese as shown below. Press toward the blue squares. You will need to make 2 of these units.
Sew those to the top and bottom of the appliqued block.

Helpful Hint….
When your seams come together in two places, butt them up against each other. Pin both sides of the seams to keep the fabric from shifting. This helps keep them perfectly aligned.


I have put the rest of the instructions for the pattern in the print out below. We will talk about several techniques that will also help you finish more projects in the months to come.
Happy quilting!


I love what You have done here. Both the quilt and the wise words of wisdom! I’m grateful for You my friend. Thanks for the quilt pattern and the quilting helps.
LikeLike