


I was able to start my new year with a perfect day! I spent the day with my girls sharing some of my basic quilting knowledge. We made hot pads. They were pretty big hot pads, but great for putting large pans on.
We each picked a pattern out of one of Lori Holt’s books. She is one of my favorite designers these days and her patterns are simple and easy to read. She has multiple blocks in each of her books that are mix and match. They are perfect for beginners!
After the girls picked their block pattern I took them upstairs to the “ fabric room.” I’m a bit of a hoarder when it comes to fabric. We all have our vices! Haha! I told them this is one of the hardest parts. They laughed and said… it’s just one block. About an hour and a half later we finally finished picking the fabric and they knew what I meant by hard! We then went over some basics. First cutting basics, then sewing basics. Quilting basics came next and finally binding basics! It really was a perfect day! I think their hot pads turned out so cute. And I loved spending time with my sweet girls!


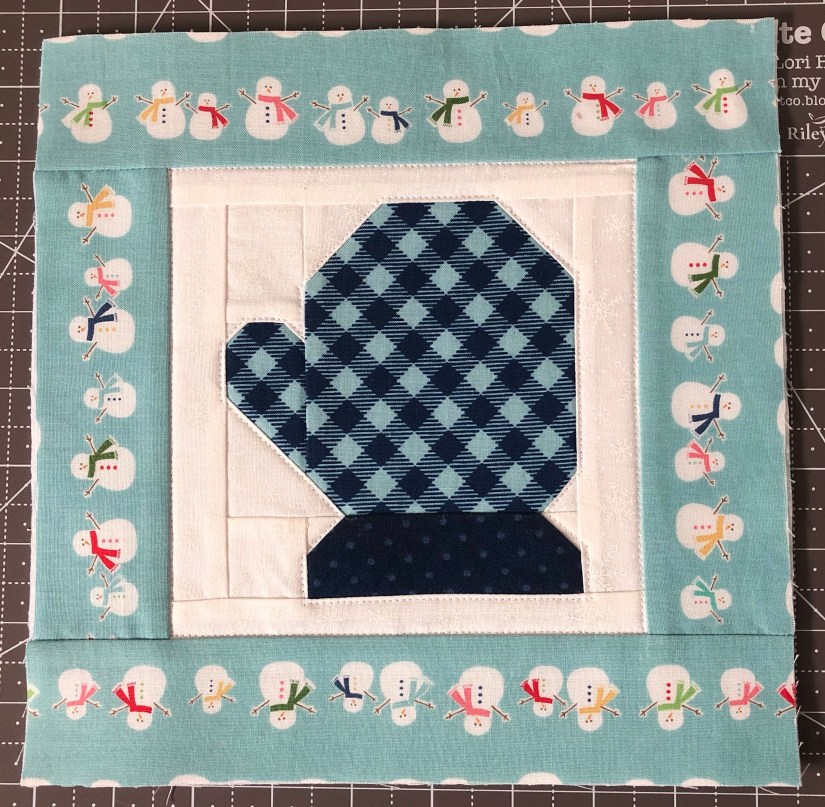
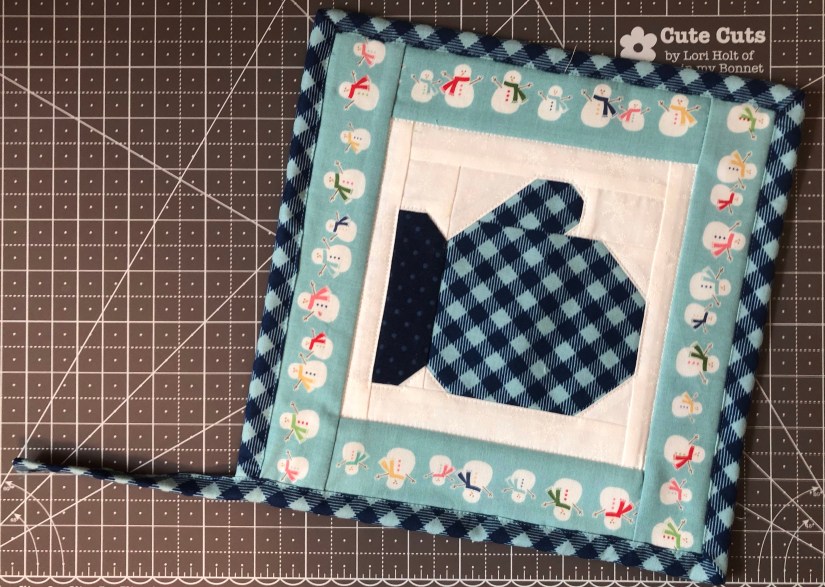
Since our hot pads were such a success, I thought it would be fun to share a hot pad pattern with my other friends. And maybe a few basic quilting skills as well. This is the Smitten with Mittens Hot Pad pattern. Stay tuned, because I’ll be highlighting some basic quilting skills in my upcoming blog posts.
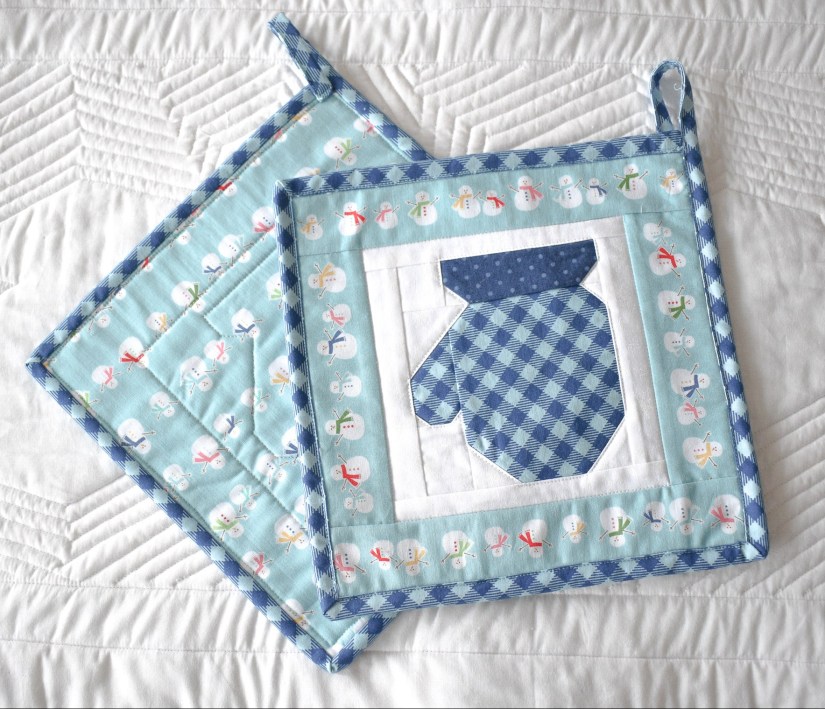
Smitten with Mittens Hot Pads Pattern
SUPPLY LIST
• Mittens fabric — fat eighth or 5″ x 15″ piece of fabric
• Cuff fabric — fat eighth or 5″ x 6″ piece of fabric
• Background fabric — ¼ yard
• Snowman border fabric — ¼ yard
• Back of hot pads — ⅓ yard
• Hot Pad Batting –10″ x 20″
CUTTING INSTRUCTIONS
I used Lori Holts – Cozy Christmas fabric line because I loved the snowmen. You will need to fussy cut the snowmen. Fussy cut is a quilting term referring to just that… being fussy about the way you cut something. The reason for this is that you don’t want to cut off all your snowmen’s heads. It wouldn’t be nearly as cute like that! Haha!
We recommend you label your pieces as you cut them out. We used Lori Holts Sew Handy Sticker Set. The stickers are easy to use, can be ironed and sewed upon and come off easily. But you can use a water erasable pen as well.
*I receive no money from either item if purchased.
Mitten fabric
Cut 2 rectangles — 4″ x 4½” (A)
Cut 2 rectangles — 1½”x 3″ (B)
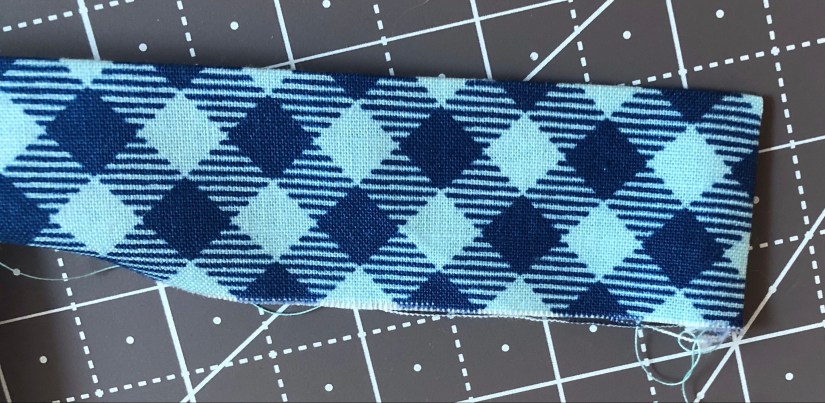
Binding — Cut 2 strip — 2½” x width of fabric
Cuff fabric
Cut 2 rectangles — 1½” x 4″ (C)
Background fabric
Cut 2 squares — 2″ x 2″ (D)
Cut 2 rectangles — 1½” x 2″ (E)
Cut 4 squares — 1½” x 1½” (F)
Cut 2 squares — 1½” x 1½” (G)
Cut 4 rectangles — 1¼” x 5½” (H)
Cut 4 rectangles — 1″ x 6½” (I)
Cut 6 squares — 1″ x 1″ (J)
Cut 4 squares — ¾” x ¾” (K)
Border fabric
Cut 4 rectangles — 2″ x 6½” (L)
Cut 4 rectangles– 2″ x 9½” (M)
Back of Hotpads fabric
Cut 2 squares — 10″ x 10″
Batting in Hotpads
Cut 2 squares — 10″ x 10″
ASSEMBLY OF HOT PADS
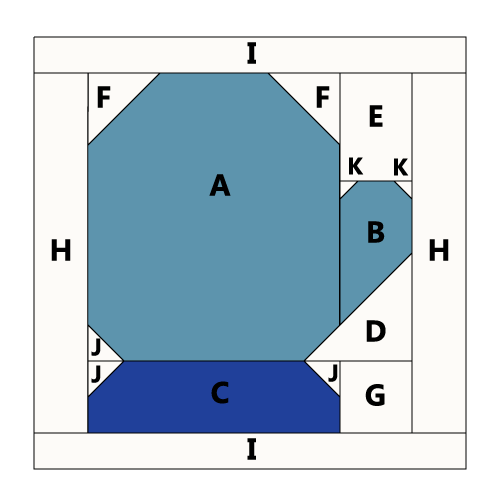
Mitten Blocks
Step 1. With right sides together, align a white square (E) on both sides of the blue rectangle (A) as shown below. Using a water-soluble pen, draw a diagonal line corner to corner on both the white squares; noting the direction of the line as shown below. Stitch on the drawn line. You will make two.

I like to press first and then trim. When pressing, line up the corners as shown below; pressing toward white. If you don’t line up the corners, your block becomes miss shaped.


Correct Incorrect
Trim away excess fabric.

Repeat process with white square (J) in the bottom left corner of the blue rectangle as shown below. Stitch on the drawn line. Trim away excess fabric. Press toward white. The Right unit will mirror the Left unit as shown below. Make mirroring or opposite AFJ units.

Step 2. Following the process in Step 1, align a white square (K) on both sides of the blue rectangle (B) as shown below. Draw line, stitch on drawn lines. Trim away excess fabric. Press toward white.

Seam white rectangle (E) to the top of the units as shown below Press toward the white. Make 2 BEK units.

Step 3. Seam AFJ units to the BEK units together as shown below. Press toward AFK unit. The units should mirror or be opposites of each other.
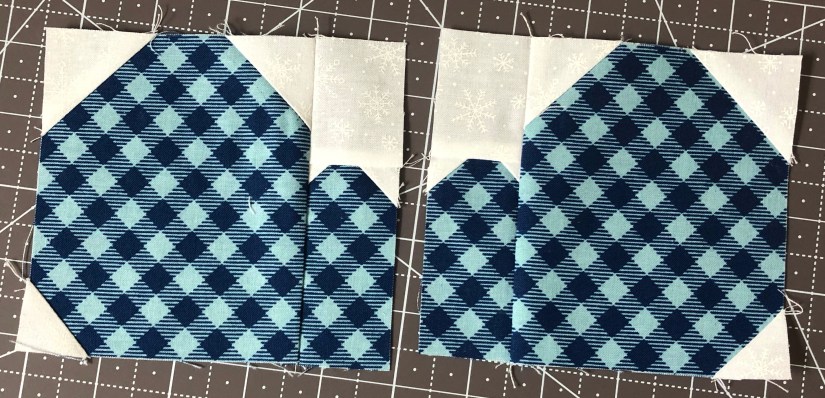
Following the process in Step 1, align a white square (D) on the inside bottom corner of the unit as shown below. Draw a line corner to corner. Stitch on drawn lines. Trim away excess fabric. Press toward the white. Make mirroring Top of mitten units.

Step 4. Following the process in Step 1, align a white square (J) on both sides of the blue rectangle (C) as shown below. Draw a line corner to corner. Stitch on drawn lines. Trim away excess fabric. Press toward the blue. This will make assembly easier and help but your seams up against each other.

Seam white rectangle (G) to units as shown below. Press toward the white. Make mirroring Mitten Cuff units.

Step 5. Seam the Top of mitten units to the Mitten Cuff units. Press toward the top. The Right unit will mirror the Left unit as shown below. Square blocks to 5″ x 5½”.

Step 6. Seam the white rectangle (H) to both sides of the block. Press toward the outside.

Seam the white rectangle (I) to the top and bottom of the blocks. Press toward the outside. Square blocks to 6½” x 6½”.

BORDERS
As mentioned above, if you are using the snowman print, you will need to fussy cut your borders as shown below. When fussy cutting, keep in mind that ¼ inch on top and bottom will be sewn in the seam.

Seam the snowman border (L) to both sides of the block. Press toward the outside.
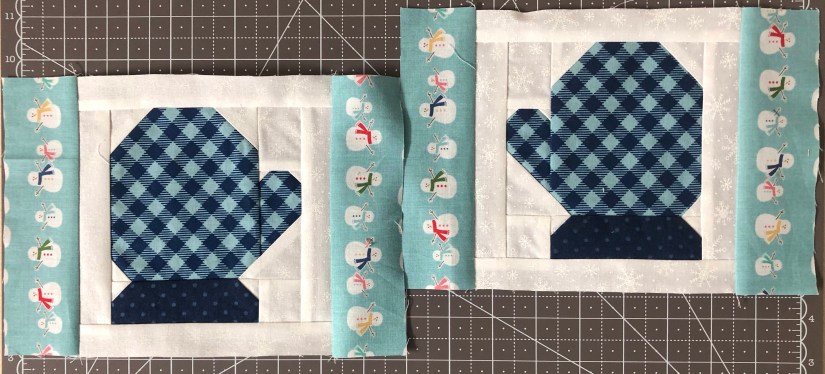
Seam the snowman border (M) to the top and bottom of the blocks as shown below. Press toward the outside of the block.

QUILTING
Sandwich batting between quilt block and backing fabric. I use a few safety pins to hold into place while quilting.

Quilt the hot pads any way you would like. I outlined the mitten and then stitched around borders. It is small, so not much quilting is required. After it is quilted. Trim off extra batting and backing. Square project to 9½” x 9½”.
BINDING
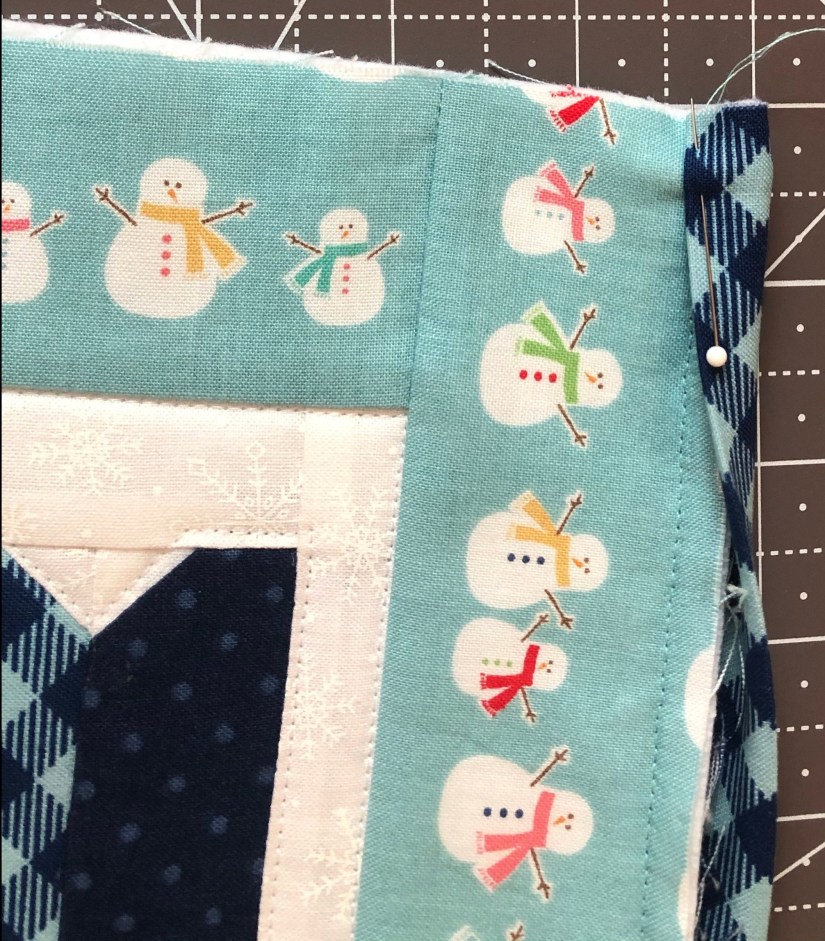
Step 1. Starting in the top corner opposite of your mitten’s thumb. See the pictures below for extra help. Seam binding along the top of the hot pad. Stitch all the way down, leaving a ¼” unsewn at the right end. (Yes my backing fabric is upside down! Oops! Haha!)
Step 2. Fold corner as shown below. Make sure the folded edge is a little bit below the raw edge as shown below. This gives you just the right amount of fabric in your corners.

Step 3. Repeat process with each corner. Sewing all the way to the bottom leaving a ¼” unsewn at the end and then folding the corner over as shown above. Before sewing the last side, fold the end of the binding, where we started, to the front side of the hot pad as shown below. Pin in place.
Step 4. Sew the last side, catching the folded over binding that we started with.

Press the binding flat with the back of the hot pad as shown below. It makes it easier to bring binding to the front of the hot pad. 
Step 5. Measure 5 inches from the edge of the binding and trim excess. If you don’t have 5 inches left, measure as long as you can; making sure both hot pads are the same length.

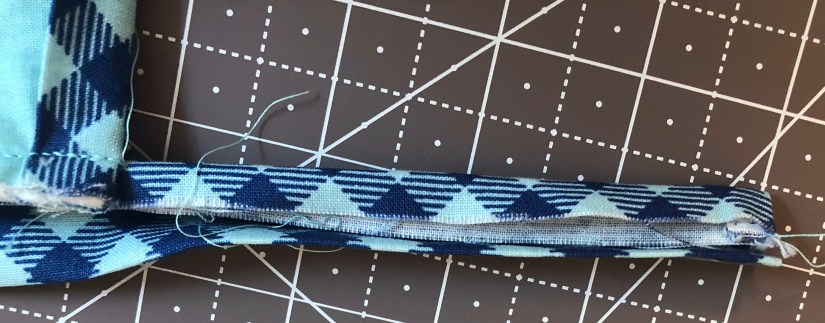
With right sides together, sew the end of the binding as shown below.

Turn right side out as shown below and press.
Step 6. Now, we need to fold that extra strip in third as shown below. Pin in place.
Step 7. Bring the edge of the binding to the front and topstitch in place. You will want to make sure to sew all the way around, including the extra strip that will be used for you hook.
Step 8. Sew the extra strip to the back of the hot pad to create a hook!

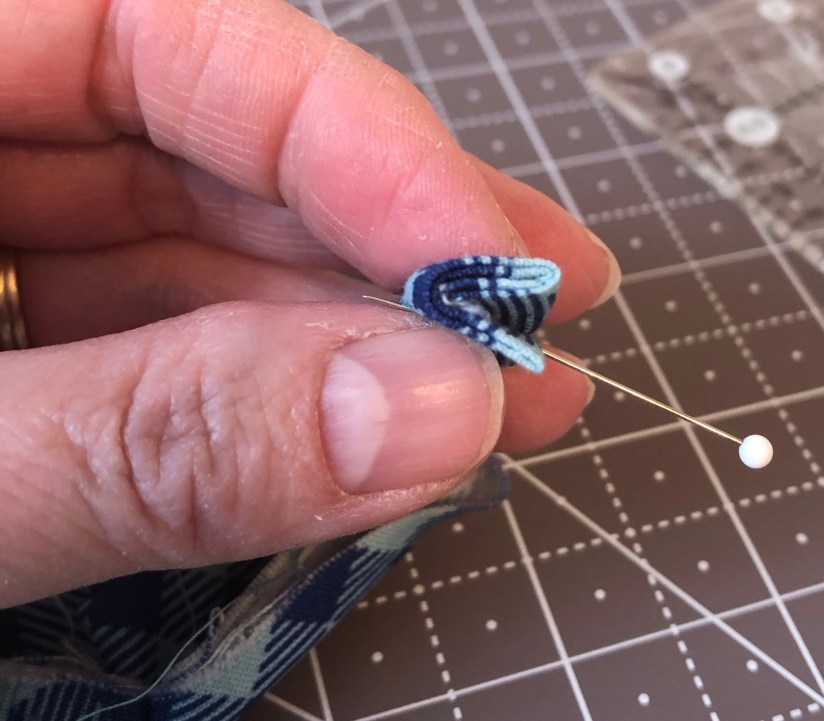
I also mirrored the binding. It is a little tricky but you can do it!
Happy Quilting!

